Cricut mats can get dirty, dull, and lose their stickiness after a while.
Ideally, mats are only to be utilized for a couple of times before they become non-sticky and inaccurate surfaces that can destroy a potentially ideal craft.
However, don’t give up on them just yet! Today, I will teach you how to clean Cricut mats and bring back their stickiness. Moreover, I will present a few ways on how to do it properly.
These methods will help you make your Cricut mats good as new. Mats come in multiple different forms but the process of cleaning should be more or less the same.
If you want to save a perfectly good mat and a couple of dollars, gather some cleaning tools and let’s get started. Hopefully, you will find my article informative and fun.

Can You Clean Cricut Cutting Mat?
The best way to clean your Cricut mat is to soak it in warm soapy water for a couple of minutes.
Once you’ve cleaned the mat, you will find that its regular stickiness has been restored. Mats somehow lose their purpose when the top has become inaccurate and unable to make precise cuts.
The moment you notice that your materials on your mat don’t stick is the moment that you should clean it. Also, if you notice soft particles or dirt on your mat, you should clean it immediately.
Cleaning your Cutting mat doesn’t requcheck ire using specialized tools and materials. You probably have most of the common cleaning tools inside your kitchen cabinet. Let’s them out!
Step 1: Light Cleaning
First and foremost, whip out your plastic scraper which should come as standard with your cutting unit. If not, find a similar scraper.
Run the material along the surface gently. Do it in a methodical way to dislodge small debris. Repeat this a couple of times before taking the next step.
Step 2: Lint Roller and Baby Wipes
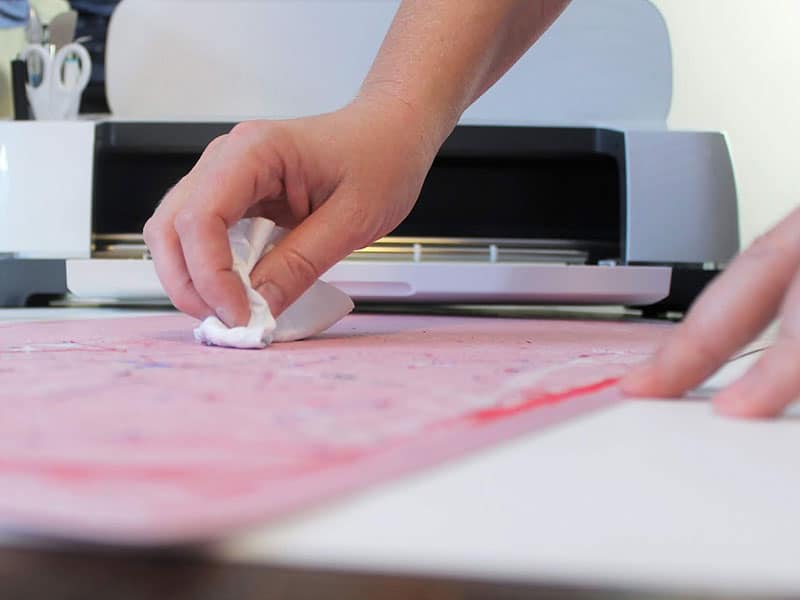
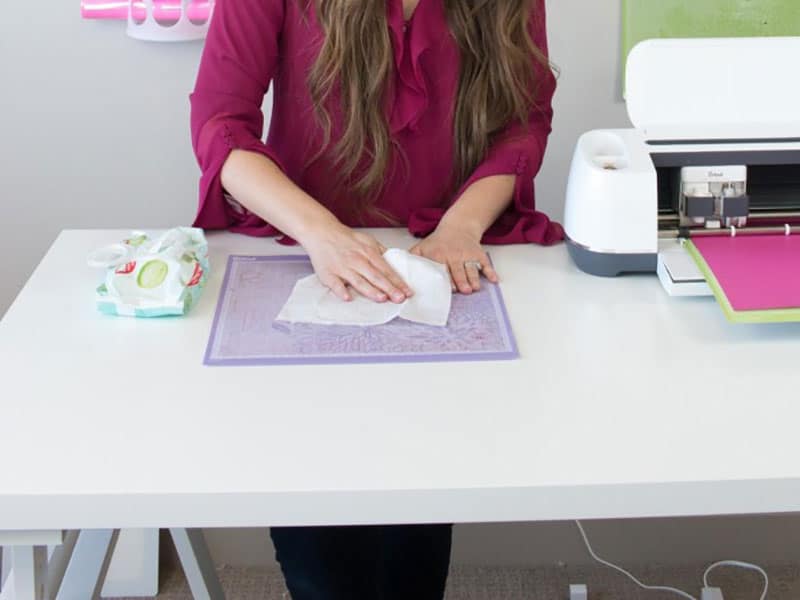
Baby wipes make a great cleaning tool for Cricut mats. They’re soft and damp enough to leave your mats undamaged. However, not all baby wipes can be used for this.
Pick one that’s alcohol and bleach-free. Otherwise, you risk losing the stickiness of your mat forever. The next step is running the baby wipe through the top slowly.
Make sure to clean everything in a straight line. Some people try to use nail varnish remover. However, it’s not a good idea so don’t be tempted to use anything harsh.
Traditional soap and water, lint rollers and baby wipes should be enough to clean your Cricut mats and restore their original stickiness.
Lint rollers have to complete two goals. The first is removing the stubborn dirt that won’t come off with mild baby wipes and plastic scrapers.
The second is transferring some of their stickiness to your old mat’s surface. Usually, the baby wipes and lint rollers are enough to clean your Cricut mats.
Step 3: Water and Soap
Give your Cricut mat bath every once in a while. Make sure that you’re using a mild soap. Let the Cricut mat soak for a couple of minutes before rinsing.
If there is stubborn dirt that won’t come off, use a small brush to clean it. Then, rinse with mild water. If you don’t have a brush, use a Magic Eraser or a sponge.
You can also use an adhesive remover for certain debris. However, make sure to read the manual before using any cleaning product. After, you will need to restick your mat.
Step 4: Air Dry
When you finally clean your Cricut mat, it’s time to dry it. It’s best to hang it up to dry. Make sure that your mat is fully dry before using it again.
Watch this video to know more about:
How Do You Clean a Cutting Mat?
Regular cleaning will extend the life of your Cricut mats. The easiest way to clean your mat is by using warm water and a couple of drops of mild detergent.
Also, use a mild, soft bristle brush such as a mushroom brush or toothbrush to make a lather and clean your mat gently. Let’s learn a few other cleaning methods.
Method 1:
The best way to keep your Cricut mats clean is to clean them regularly. It’s recommended to give your Cricut mats a light cleaning which includes a plastic scraper.
After, roll a lint roller over the top of the mat or wipe an alcohol-free baby wipe. Lint rollers are sticky so they can remove any debris and bring back the stickiness of your mat.
The next step is to wash your mat in soapy water if you have used it repeatedly. Apply this method only if you notice that your mat is starting to lose its stickiness.
Make sure to use warm water and a small amount of regular soap or dish soap. Scrub the surface of the mat gently. You can use a small brush to take off stubborn dirt if any.
Rinse the top off with lukewarm water. If you don’t have a brush, you can either use a Magic Eraser. This sponge is soft enough to prevent damage but can also remove residue.
The next step is spraying a degreaser on the surface. If your Cricut mat is dirty and lost all its stickiness, it requires a stronger cleaning method. A degreaser can remove just anything.
A degreaser can leave a residue, so your mat needs to be washed with water and soap after the process. Keep in mind that a strong degreaser can ruin the stickiness of your mat.
But you can always restore the stickiness after your Cricut mat is clean and dry. For the best results, let your mat air dry. You can just hang it up or put it on a drying rack.
This will allow both sides to dry completely. No matter which cleaning method you pick, it’s important to leave your Cricut mat to dry completely before using it again.
Otherwise, you risk losing all its stickiness and damage your cutting machine. Avoid using a towel to dry it faster. Using a towel over the sticky top will reduce its effectiveness.
Watch this video to know more about:
Method 2:
This cleaning method is intended for cleaning Cricut cake mats. First and foremost, make sure to remove all the fondant, frosting or gum paste.
Some Cricut units are created specifically to slice decorative pieces out of frosting sheets, gum paste and fondant. After the cutting process, you will need to remove any leftovers.
The next step is using a plastic scraper to scrape off excess shortening.
In case you didn’t know, the food sheets sliced with these special units are held on the cutting mat with a dense layer of shortening instead of a sticky mat.
Afterwards, use soapy warm water to clean your mat. Scrub it to take off the excess shortening. Utilize a small brush or regular dish sponge to clean everything.
It’s recommended to use only non-toxic cleaners that are safe for use with kitchen tools. This is why dish soap and warm water works great for cleaning Cricut mats.
Last but not least, let your mat air dry. Just like the rest of the Cricut mats, the cake mats need to be dry before you use them again. Again, avoid using a towel to dry them.
Otherwise, the towel will leave fibres on the top of your mat. And guess where those fibres will go after? That’s right! They will go straight to your gum paste, fondant or frosting.
Method 3:
The last method I will present today includes using a magic eraser known as the Totally Awesome Spray. You can find it in your local shop.
You will also need a silicone squeegee. The first step is spraying a generous amount of the liquid on your mat. Let it sit for about 15 minutes.
Afterwards, take your silicone squeegee and begin pushing the dirt off your Cricut mat. Don’t press hard. Medium pressure will do the job just fine.
Then, use some warm or cold water and rinse off your mat. Leave your mat for about an hour to air dry. After this, you will get a sticky mat ready for use.
Watch this video to know more about:
There is another product you can use to clean your mat. It’s called Goo Gone. It’s a very popular product for cleaning. Just put a small amount of Goo Gone on your mat.
Spread it around with a tissue. Leave it for about 15 minutes. Then, utilize a scraper (you can also use an old credit card if you don’t have a scraper) to remove the dirt.
Wash your mat to make sure all the product is gone. Once it’s cleaned and fully dried, check if it’s sticky enough. If it’s not, you will need to restick your Cricut mat.
Watch this video to know more about:
How Do You Refresh a Cutting Mat?
Regular cleaning extends the life of your cutting mat. To refresh your cutting mat, it’s recommended to wash it under lukewarm water for about 1 minute without soap.
After, let it air dry completely. Check its stickiness after the refreshing process. Utilize a plastic scraper if your mat isn’t sticky enough to roughen up the top of your cutting mat.
How Long Does a Cricut Mat Last?
Cricut mats are supposed to last for 24 to 40 uses. However, as I mentioned previously, regular cleaning can extend their life.
Can I Use Spray Adhesive on My Cricut Mat?
Yes, you can use spray adhesive on your mat. However, make sure to follow the instructions. Wait for 10 minutes for the product to dry and stick into your mat.
How to Clean Cricut Mat With Baby Wipes?

It’s recommended to use bleach and alcohol-free baby wipes to clean your mat. The cleaning process is very simple. Just run the baby wipe through the top softly.
Watch this video to know more about:
How to Make Cricut Mats Sticky Again?
Has your mat lost its stickiness? Is your mat inaccurate? Don’t worry! You can restore its stickiness with a few methods and make it functional again.
All you need is a sticky spray, also known as an adhesive spray or repositionable adhesive. You can get a spray like this online or in a retail craft store.
It’s relatively cheap and effective. However, keep in mind that each spray has different instructions. This means that you need to follow the instructions.
The first step is securing the edges of your mat with a painter’s tape or masking. Don’t make your edges sticky so they don’t destroy the cutting unit.
Next, take away any remaining stickiness to make sure the spray will coat the Cutting mat evenly. Apply a Goo Gone or rubbing alcohol on the top. After, go over it with a scraper.
The next thing you need to do is add the sticky spray or slowly spray and coat the top of the Cutting mat evenly. Some items will need you to brush a couple of times.
Others do the job by making contact. However, make sure to follow the instructions on the back of your product for the best results.
The final step is letting the spray adhesive rest and connect with the top of your mat properly. After 20 minutes, remove the tape on the edges carefully.
Analyze the finished product. If you have done everything correctly, your mat should be sticky again and ready for action.
Watch this video to know more about:
Final Words
Cleaning your Cricut mat matter because it extends its life and ensures precise cuts.
Also, it makes sure that lint, dirt and dust won’t get in your way during work. Taking care of your Cricut mat is important and easy. You can do it at home with normal cleaning tools.
Resticking your Cricut mat is also easy. Save your hard-earned money and restore your old Cricut mat by following the tips and tricks presented in this guide. They’re cheap and they work.
Hopefully, my short, detailed guide has taught you how to clean Cricut mats properly.


 Top 6 Best Silhouette Machines